face_livelyness_detection
A Flutter package to detect livelyness of a face.
Index
What is the Livelyness Detection?
Liveness detection in facial recognition for biometrics is a method that ensures the individual in front of the camera is a real, living person. This technology helps distinguish a genuine presence from attempts to deceive the system, such as when a fraudster uses someone else’s physical traits or biometric data (referred to as "spoofs") for impersonation.
Spoofing techniques, including printed photos, video recordings, deepfake images, and 3D masks, pose significant risks. To counteract these threats, facial liveness detection employs advanced features to identify and prevent biometric spoofing attempts. These attempts often involve mimicking a person’s unique biometric characteristics to trick or bypass the system’s authentication process. While facial recognition can reliably confirm if the person is the correct match, it falls short of verifying if they are alive. Liveness detection bridges this gap, playing a crucial role in detecting and preventing fraud. For biometric systems to maintain trust and protect data integrity, they must effectively detect and counter spoofing attacks.
Platform Support
| iOS | Android | MacOS | Web | Linux | Windows |
|---|---|---|---|---|---|
| ✔️ | ✔️ |
Installation
First, we have to install the package on flutter.
Flutter Setup
Add face_livelyness_detection to your pubspec.yaml dependencies.
Using command-line
flutter pub add face_livelyness_detection
Native Setup
Next comes the native setup on both android and iOS
iOS
iOS Setup
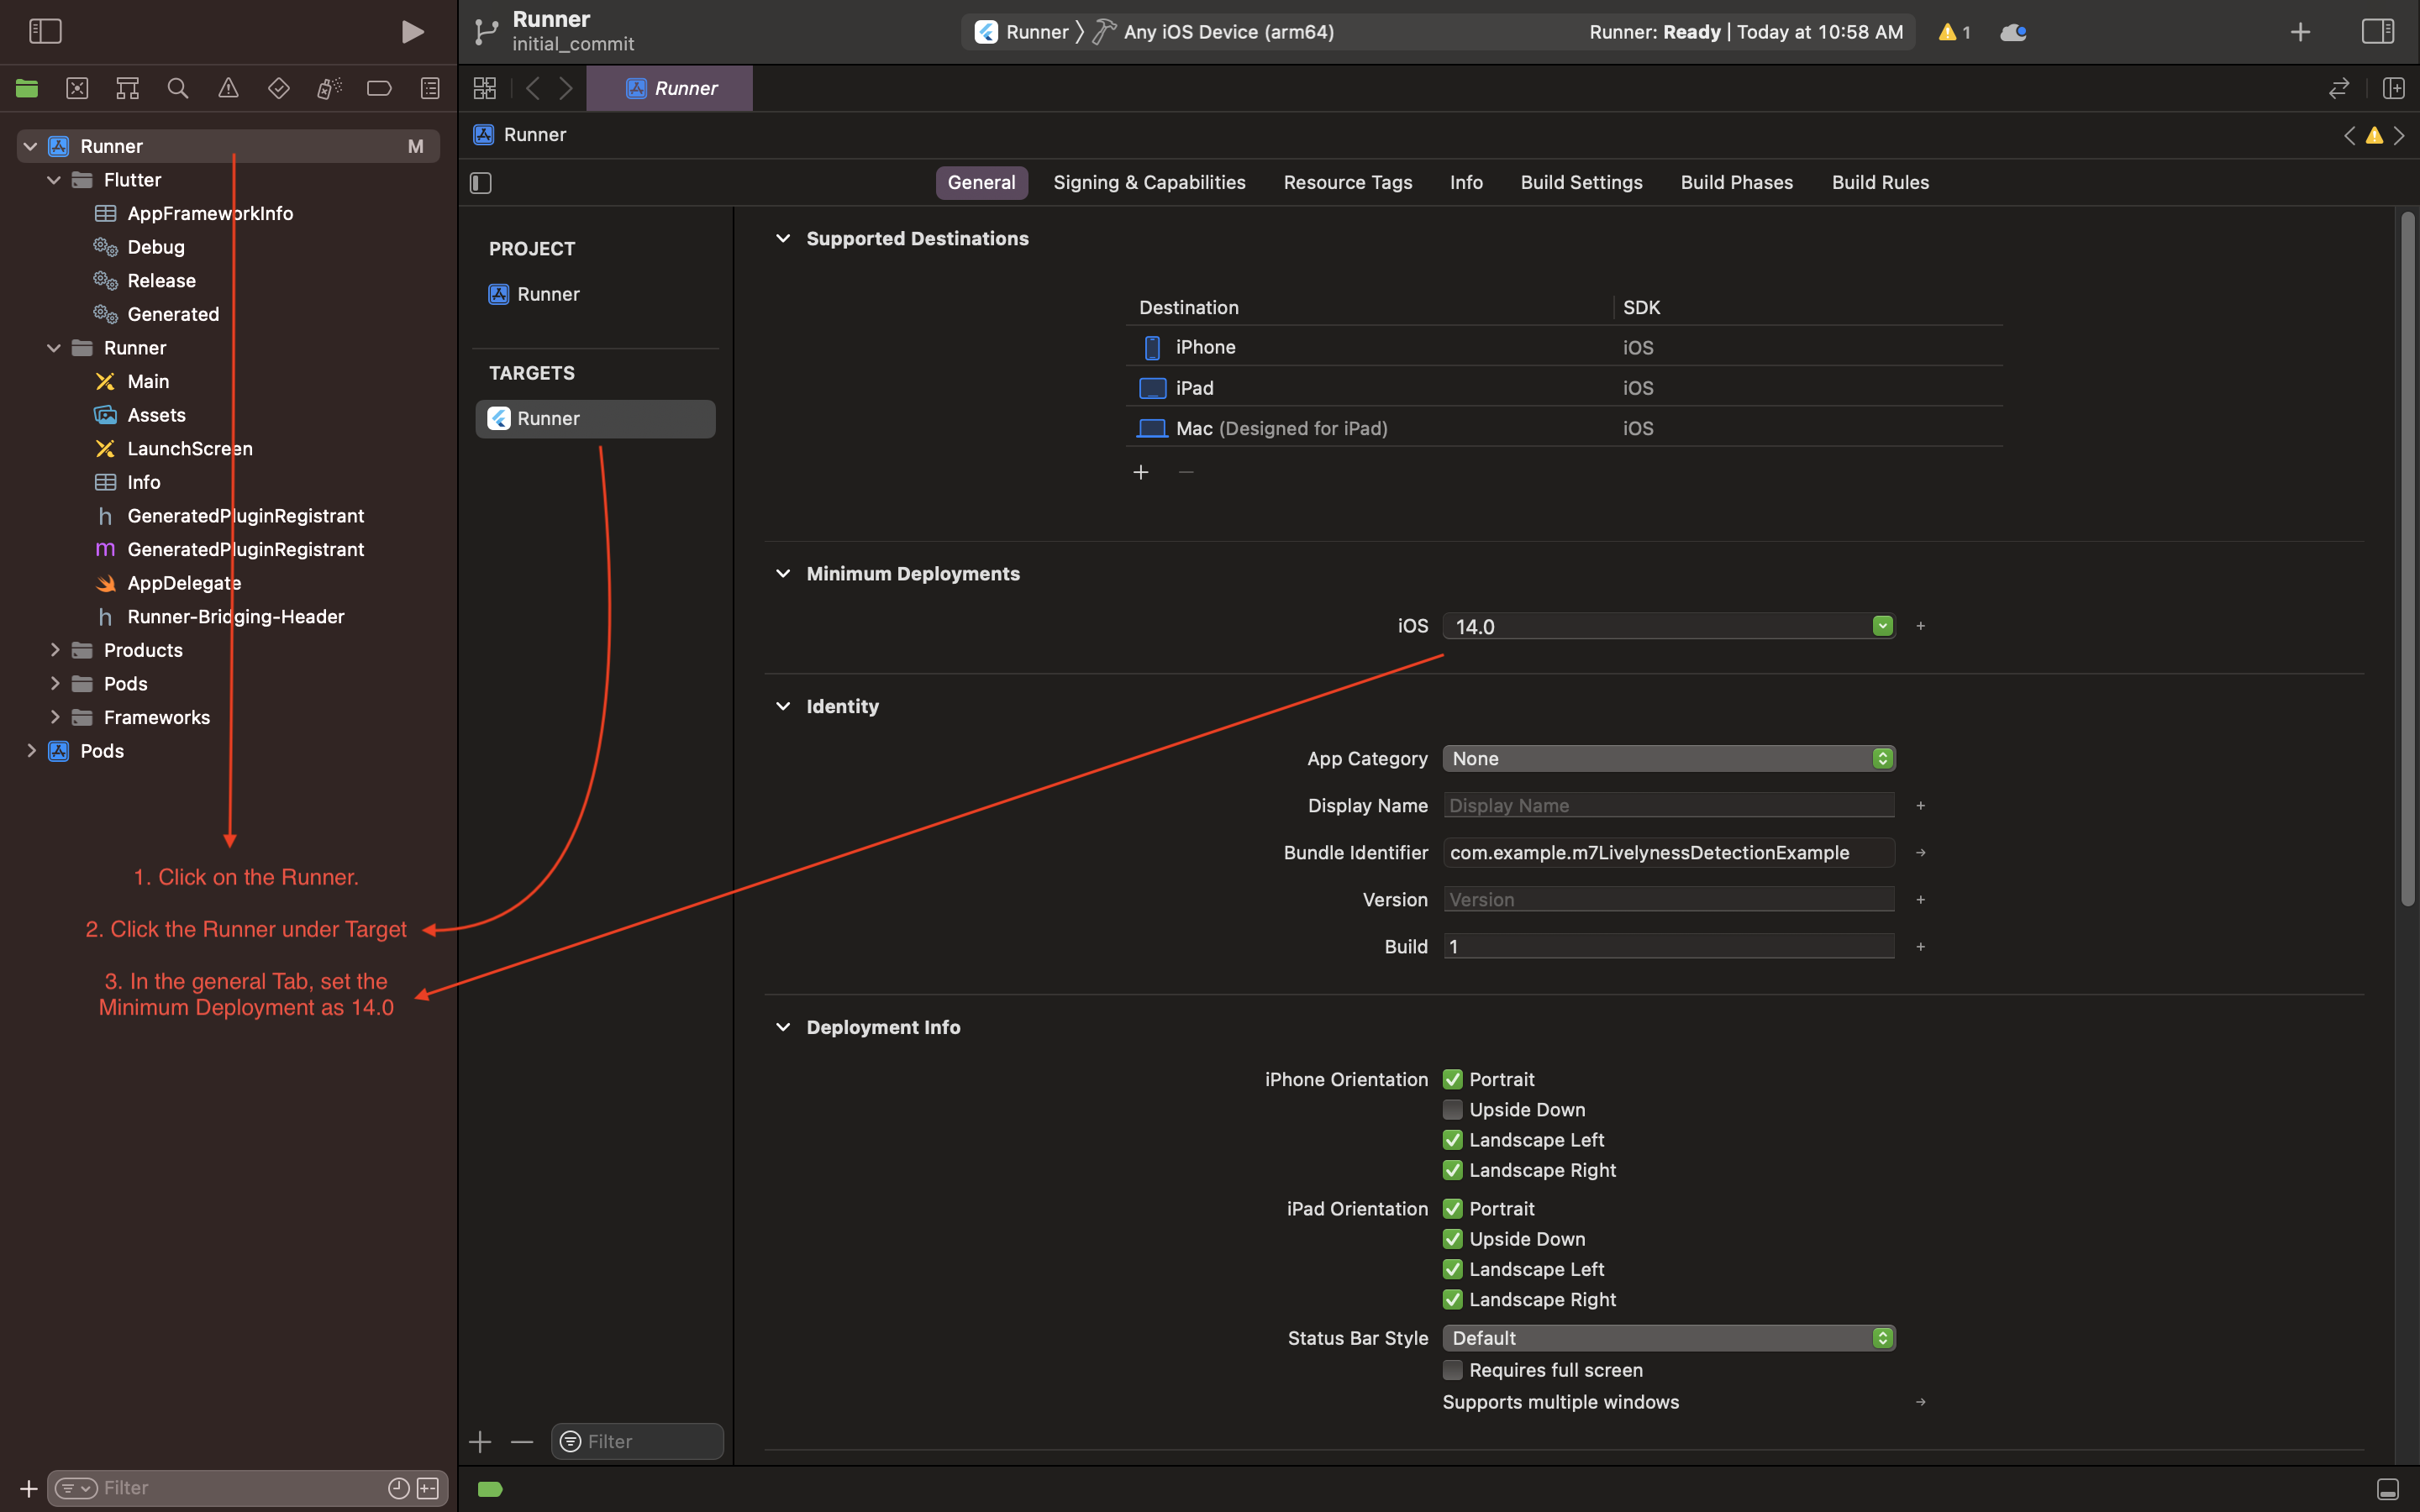
- Open the project in Xcode and set the deployment
- Open the
ios/Runner/Info.plistfile asSource Code. - Add the below-mentioned code inside the
<dict>tag.
  <key>NSCameraUsageDescription</key>
  <string>Camera Access for Scanning</string>
  <key>NSMicrophoneUsageDescription</key>
  <string>Microphone for playing instructions audio.</string>
- Open the
ios/Runner/Podfileand uncomment the second line.
platform :ios, '14.0' # <---------- Uncomment this line
- Set the deployment target in the Xcode project
Android
Android Setup
- Open the
example/android/app/build.gradlefile and set theminSdkVersionas21.
Example
A call to a single line function will return a temporary path to the captured image.
Code
    final String? response =
        await FaceLivelynessDetection.instance.detectLivelyness(
      context,
      config: FaceLivelynessDetectionConfig(
        steps: [
          FaceLivelynessStepItem(
            step: FaceLivelynessStep.blink,
            title: "Blink",
            isCompleted: false,
          ),
          FaceLivelynessStepItem(
            step: FaceLivelynessStep.smile,
            title: "Smile",
            isCompleted: false,
          ),
        ],
        startWithInfoScreen: true,
      ),
    );
Contributors
