zego_uikit_prebuilt_video_conference 1.1.9  zego_uikit_prebuilt_video_conference: ^1.1.9 copied to clipboard
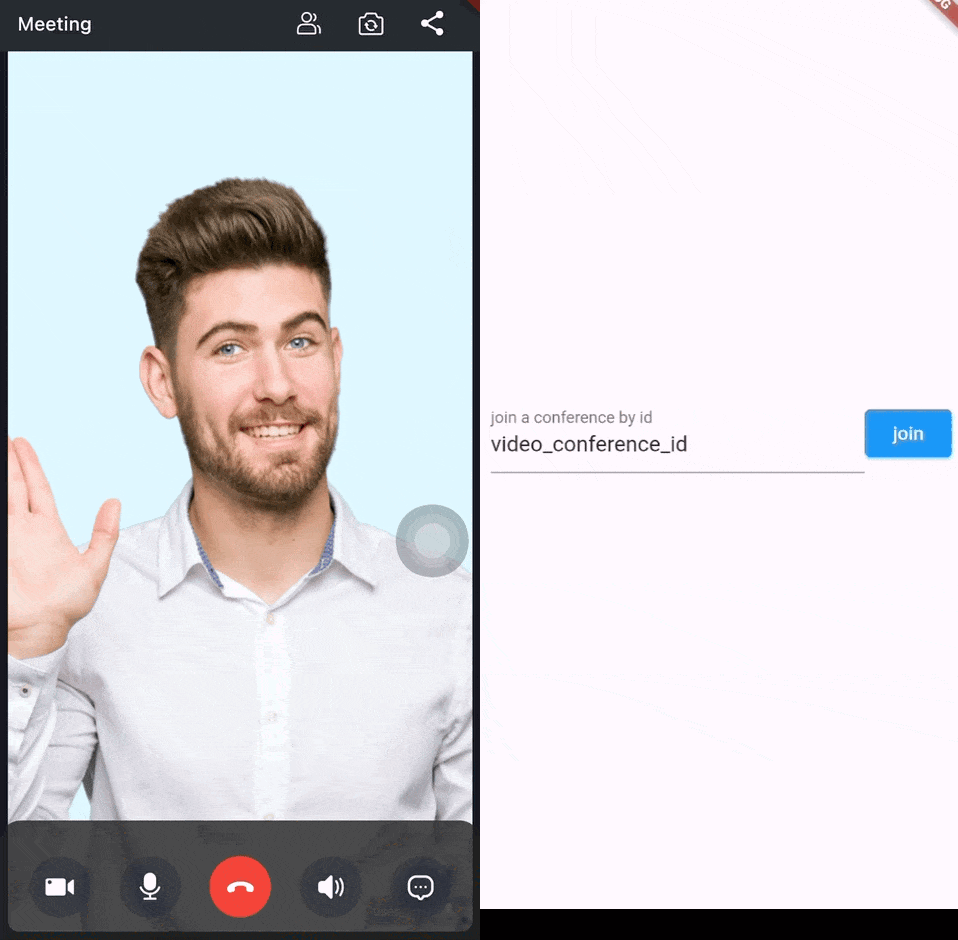
PrebuiltVideoConference is a full-featured Video Conference kit that provides a ready-made group voice/video chat, in-room message, dynamic layout, member list, etc.
Quick start #
Prerequisites #
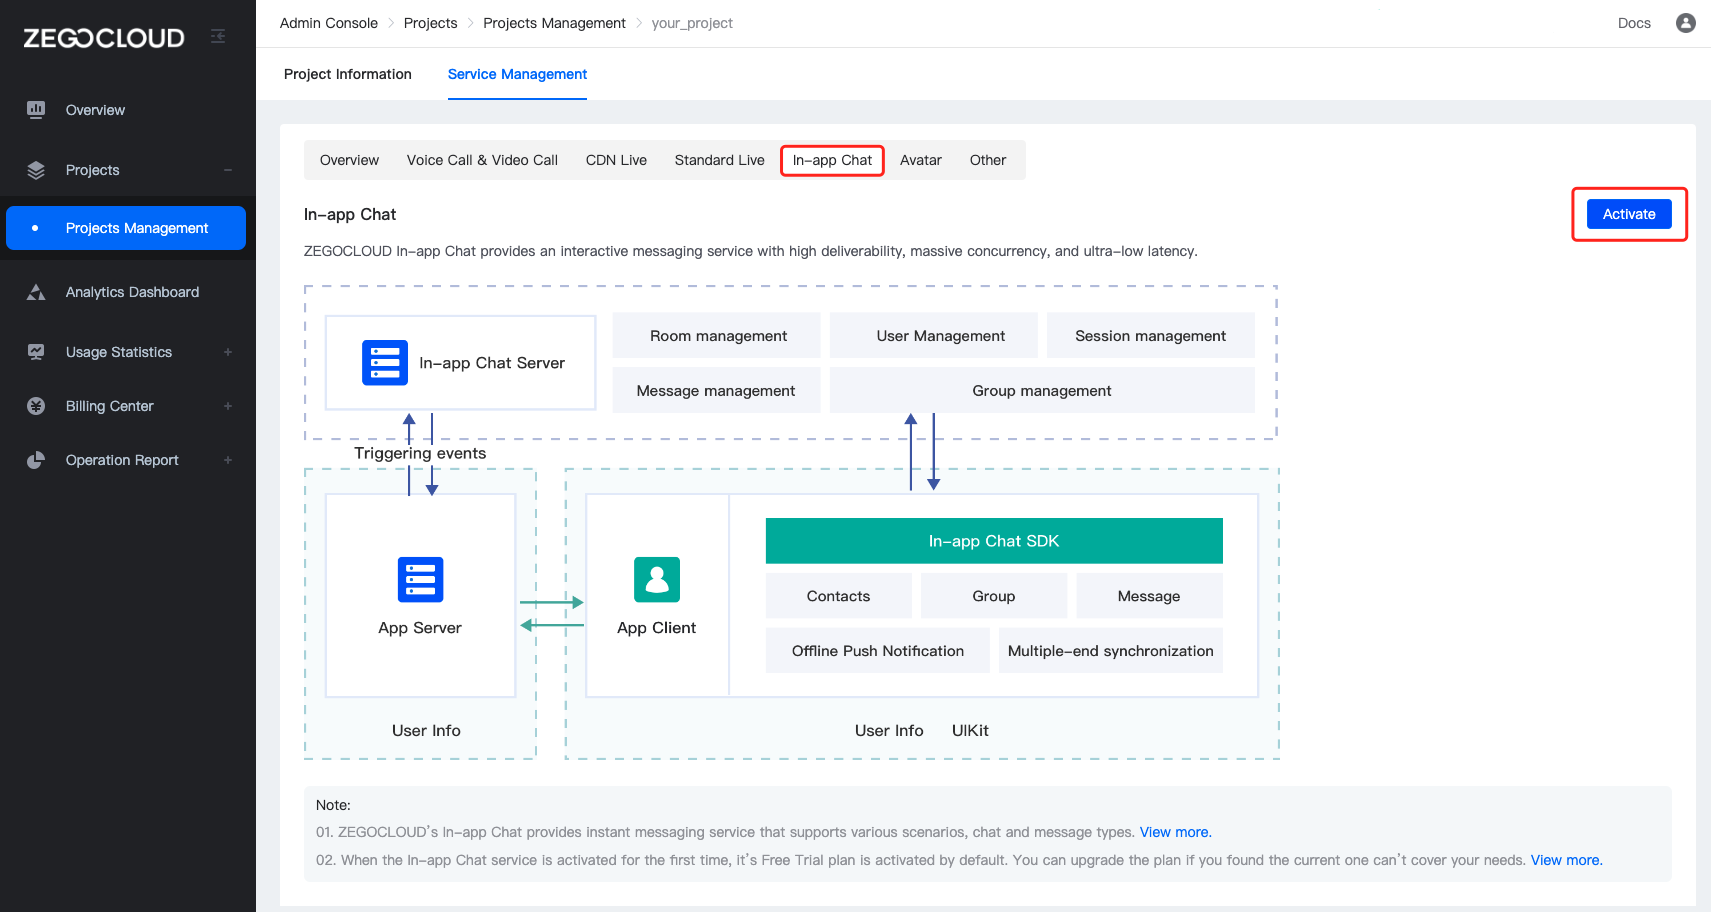
- Go to ZEGOCLOUD Admin Console|_blank, and do the following:
- Create a project, get the AppID and AppSign.
- Activate the In-app Chat service (as shown in the following figure).
Integrate the SDK #
Add ZegoUIKitPrebuiltVideoConference as dependencies #
Run the following code in your project root directory:
flutter pub get zego_uikit_prebuilt_video_conference
This will add a line like this to your project's pubspec.yaml file (and Flutter will automatic run an implicit flutter pub get):
dependencies:
  zego_uikit_prebuilt_video_conference: ^1.1.9 # Add this line.
Import the SDK #
Now in your Dart code, import the prebuilt Video Conference Kit SDK.
import 'package:zego_uikit_prebuilt_video_conference/zego_uikit_prebuilt_video_conference';
Using the ZegoUIKitPrebuiltVideoConference in your project #
- Go to ZEGOCLOUD Admin Console|_blank, get the
appIDandappSignof your project. - Specify the
userIDanduserNamefor connecting the Video Conference Kit service. - Create a
conferenceIDthat represents the video conference you want to start.
userIDandconferenceIDcan only contain numbers, letters, and underlines (_).- Using the same
conferenceIDwill enter the same video conference.
class VideoConferencePage extends StatelessWidget { final String conferenceID; const VideoConferencePage({ Key? key, required this.conferenceID, }) : super(key: key); @override Widget build(BuildContext context) { return SafeArea(child: ZegoUIKitPrebuiltVideoConference( appID: /*input your AppID*/, appSign: /*input your AppSign*/, userID: 'user_id', userName: 'user_name', conferenceID: conferenceID, config: ZegoUIKitPrebuiltVideoConferenceConfig(), ),); } }
Now, you can start a video conference by navigating to this VideoConferencePage .
Configure your project #
- Android:
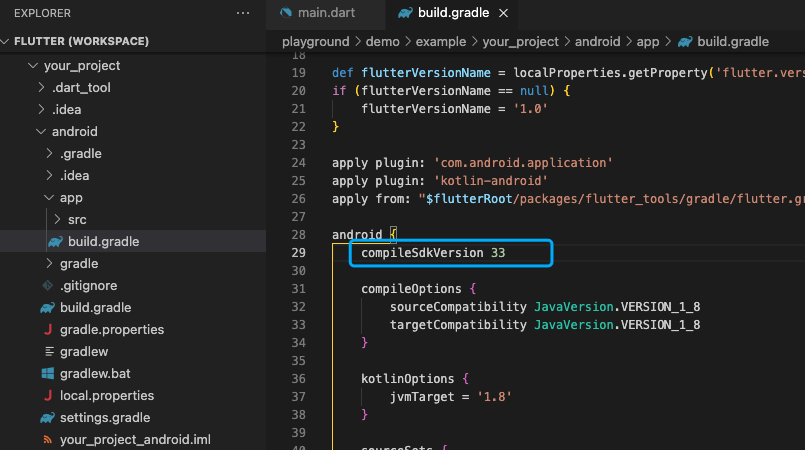
- If your project is created with an old (not the latest) version of Flutter, you will need to open the
your_project/android/app/build.gradlefile, and modify thecompileSdkVersionto 33.
- Add app permissions.
Open the file
your_project/app/src/main/AndroidManifest.xml, and add the following code:<uses-permission android:name="android.permission.ACCESS_WIFI_STATE" /> <uses-permission android:name="android.permission.RECORD_AUDIO" /> <uses-permission android:name="android.permission.INTERNET" /> <uses-permission android:name="android.permission.ACCESS_NETWORK_STATE" /> <uses-permission android:name="android.permission.CAMERA" /> <uses-permission android:name="android.permission.BLUETOOTH" /> <uses-permission android:name="android.permission.MODIFY_AUDIO_SETTINGS" /> <uses-permission android:name="android.permission.WRITE_EXTERNAL_STORAGE" /> <uses-permission android:name="android.permission.READ_PHONE_STATE" /> <uses-permission android:name="android.permission.WAKE_LOCK" />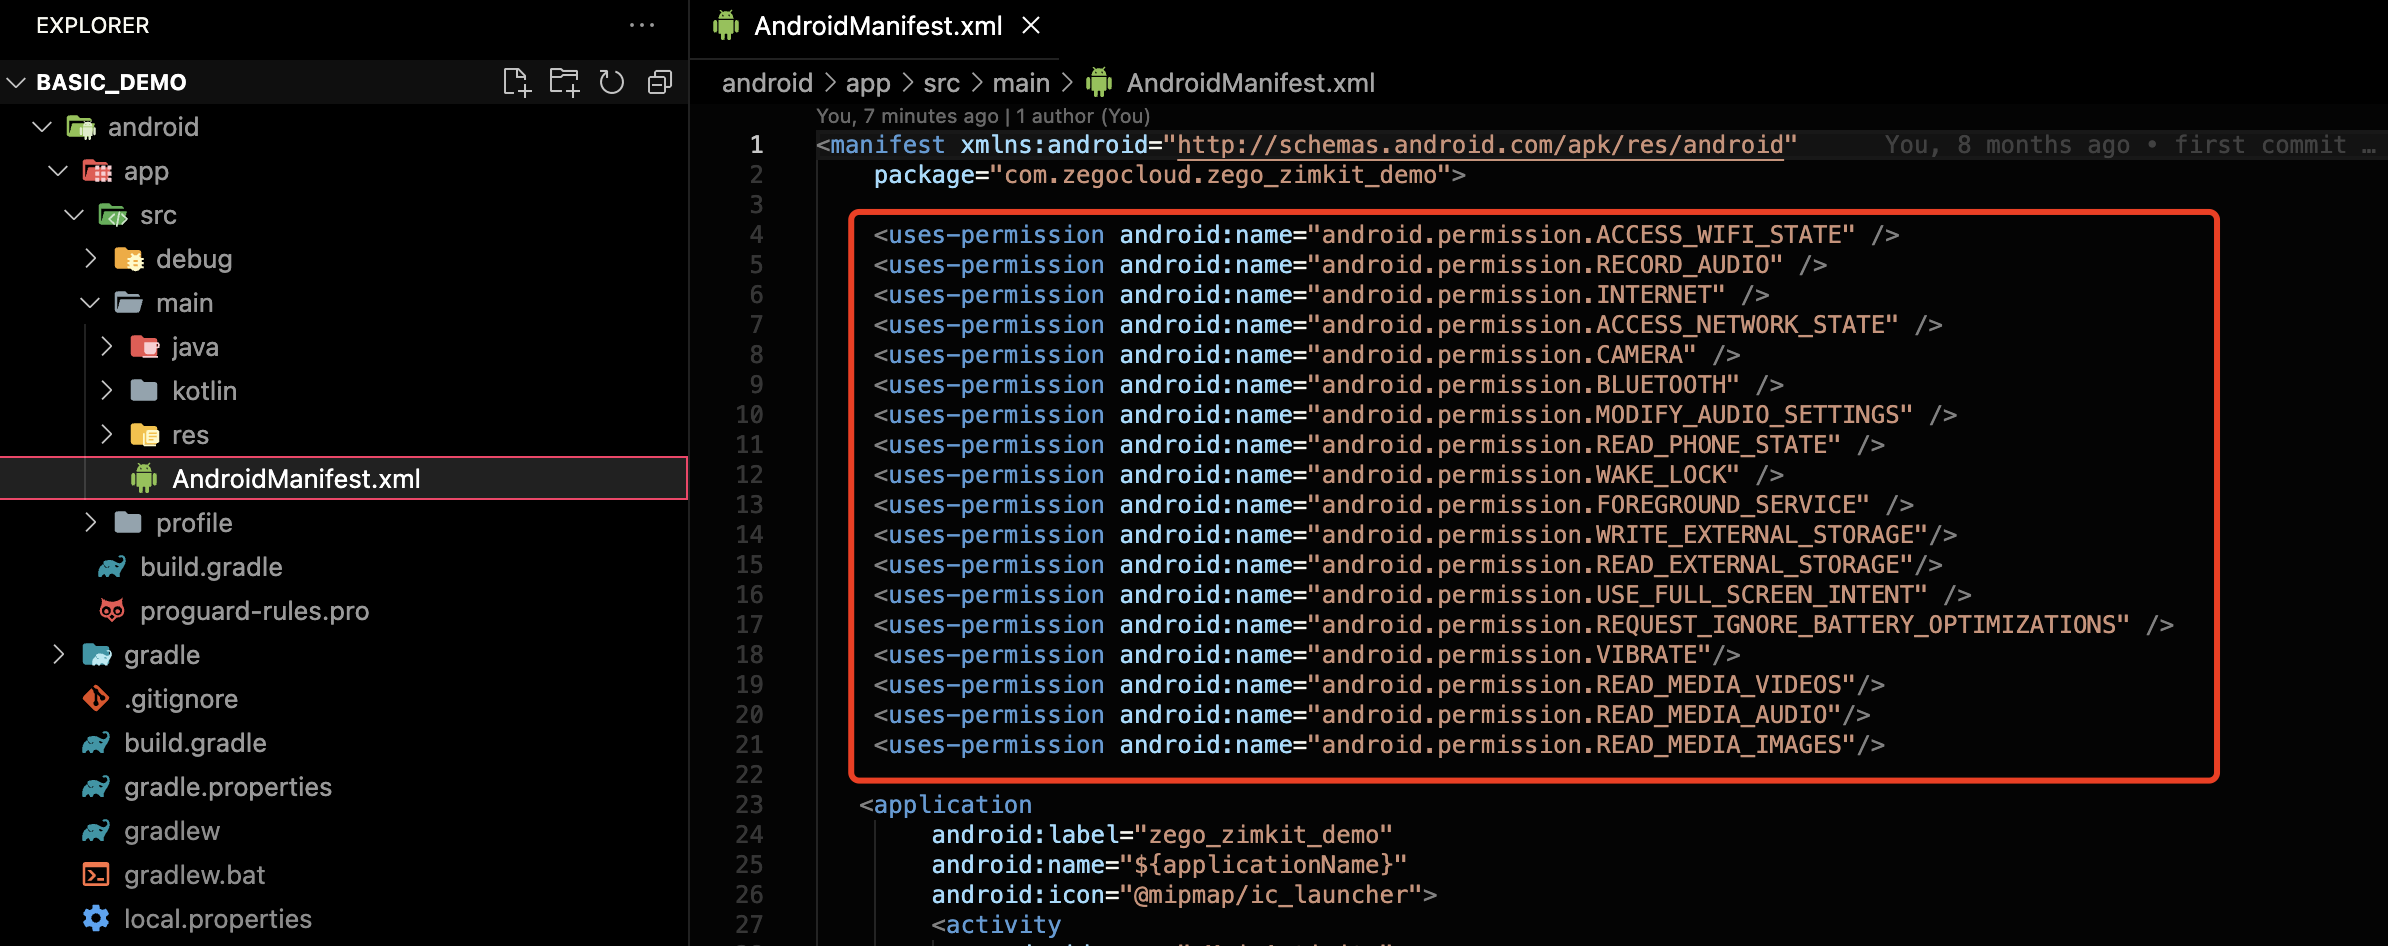
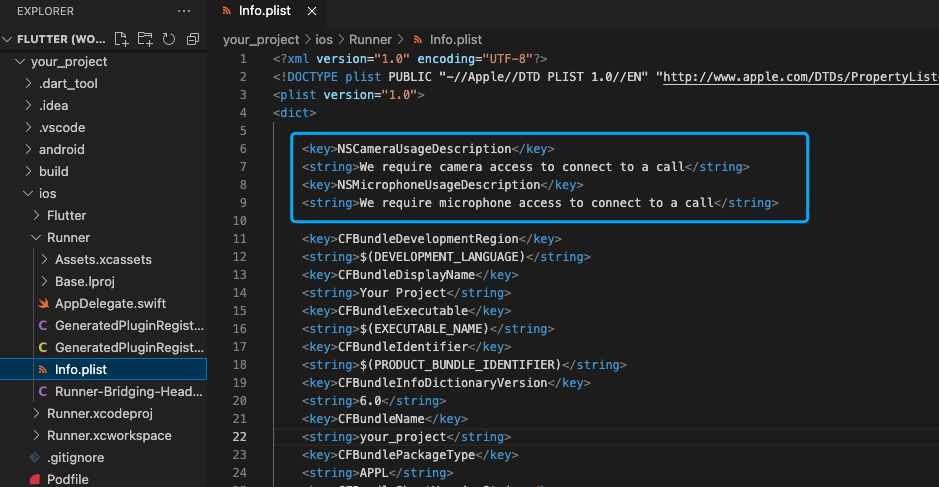
- iOS:
To add permissions, open your_project/ios/Runner/Info.plist, and add the following code to the dict part:
<key>NSCameraUsageDescription</key>
<string>Access permission to camera is required.</string>
<key>NSMicrophoneUsageDescription</key>
<string>Access permission to microphone is required.</string>
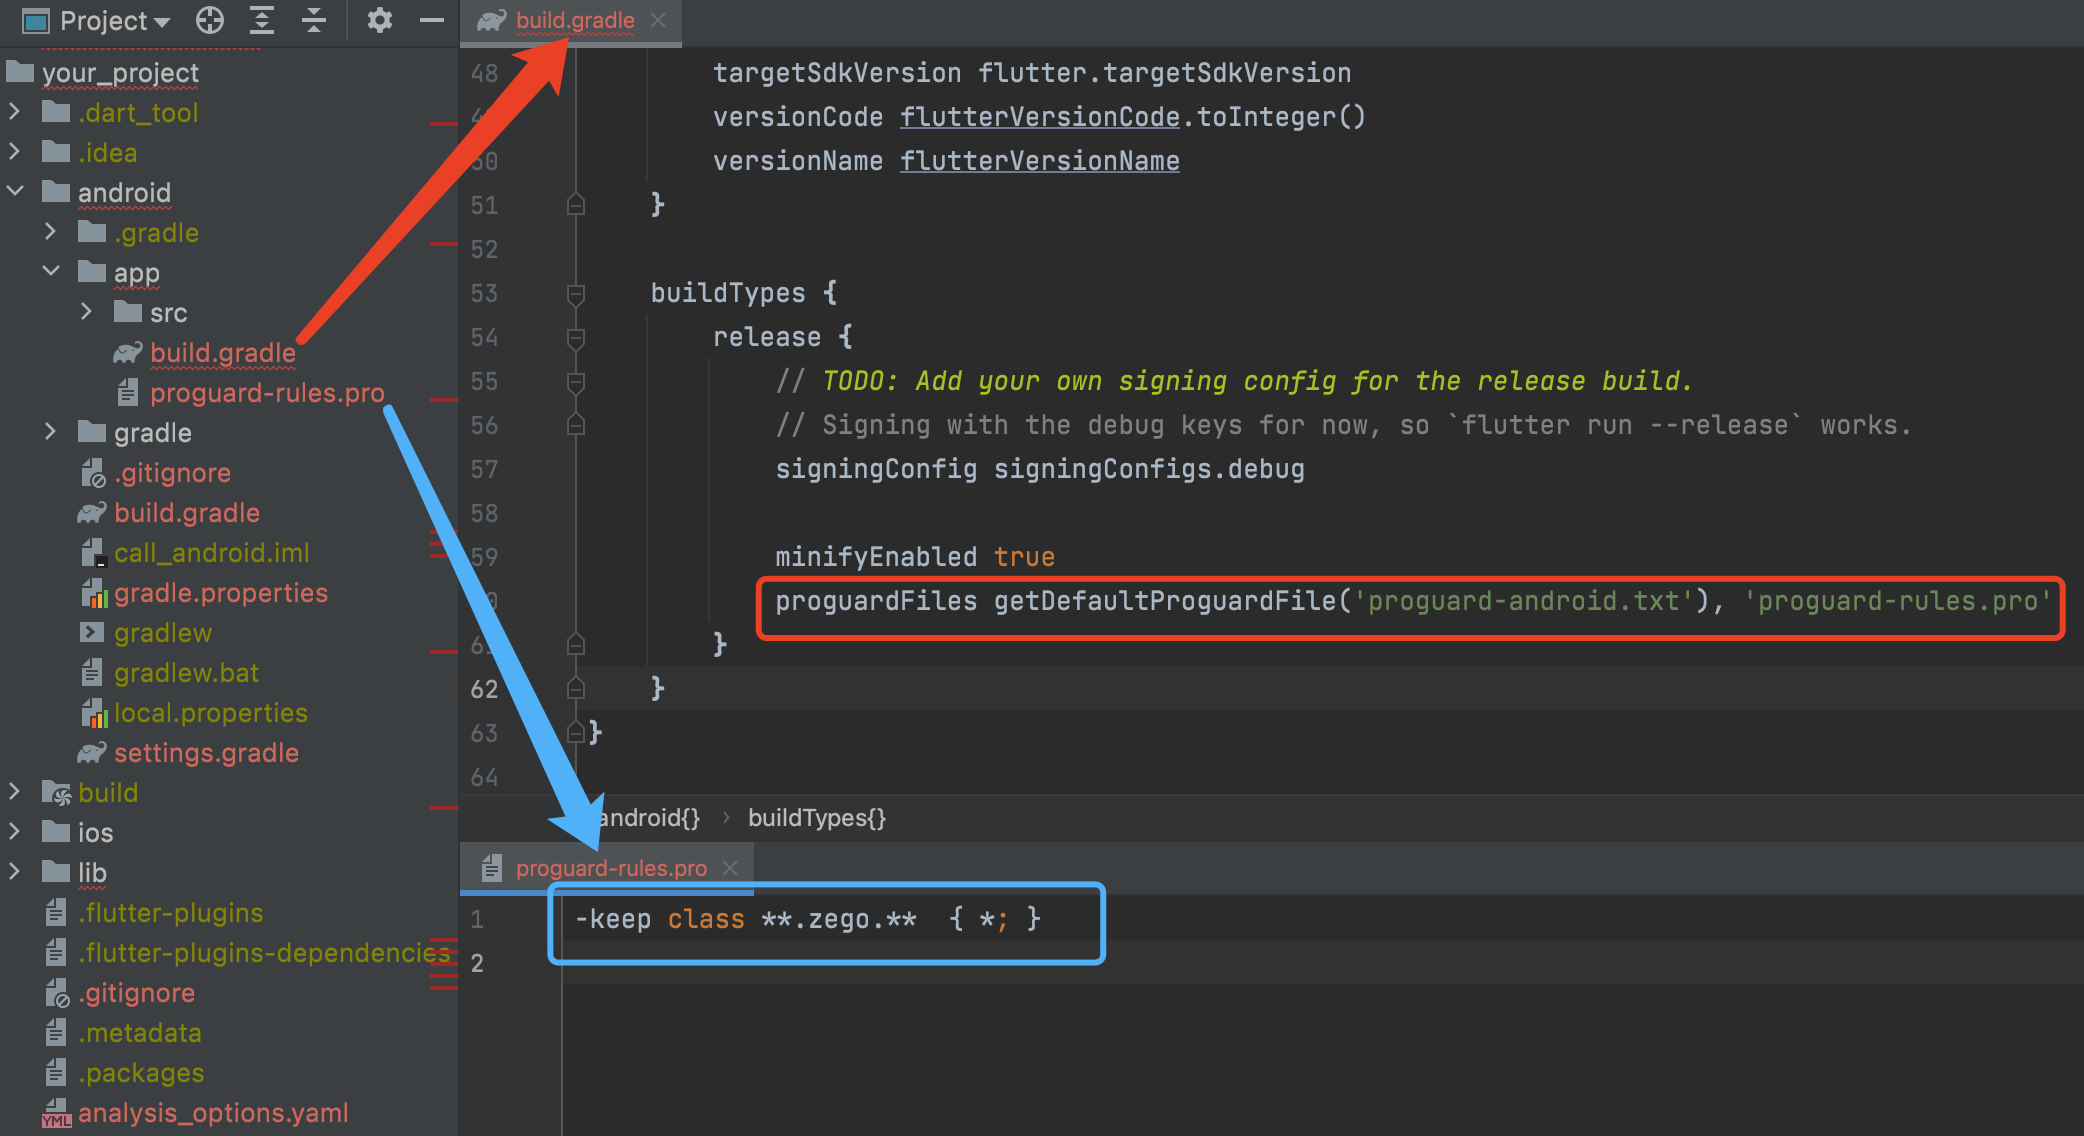
Turn off some classes's confusion #
To prevent the ZEGO SDK public class names from being obfuscated, please complete the following steps:
- Create
proguard-rules.profile under [your_project > android > app] with content as show below:
-keep class **.zego.** { *; }
- Add the following config code to the release part of the
your_project/android/app/build.gradlefile.
proguardFiles getDefaultProguardFile('proguard-android.txt'), 'proguard-rules.pro'
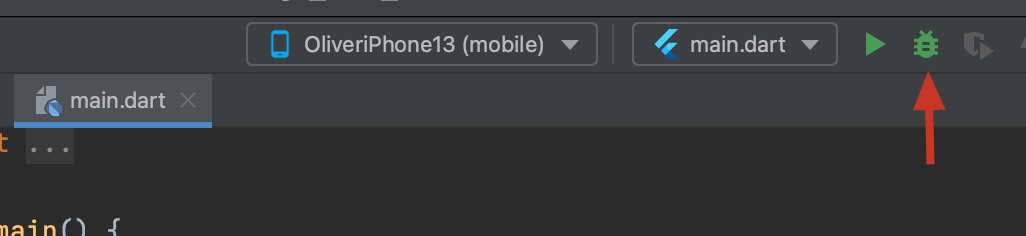
Run & Test #
Now you have finished all the steps!
You can simply click the Run or Debug to run and test your App on your device.
Related guide #
Custom prebuilt UI
Resources #
Metadata
Publisher
Weekly Downloads
Metadata
PrebuiltVideoConference is a full-featured Video Conference kit that provides a ready-made group voice/video chat, in-room message, dynamic layout, member list, etc.
Homepage
Repository (GitHub)
View/report issues
License
![]() unknown (license)
unknown (license)
Dependencies
flutter, flutter_screenutil, http, zego_uikit
More
Packages that depend on zego_uikit_prebuilt_video_conference